Accessory
DO NOT RE-UPLOAD THE HATEXAMPLE SAMPLE TO THE WORKSHOP! IT WILL BE REMOVED
Prerequisites
Make sure you have:
- Delivery & Beyond installed
- Unity (version that the project uses)
- Git (https://git-scm.com/install)
- Blender? Any modelling tool with fbx support
Setup
1. Clone the Custom Map Unity Project Example
https://github.com/edunad/delivery-beyond-custom-map
3. Create a New Folder Inside MODS/
- Create a new folder inside mods with the accessory name
Accessory names are unique, so make sure you don't use a common name. Instead use something like myname_type_accessoryname
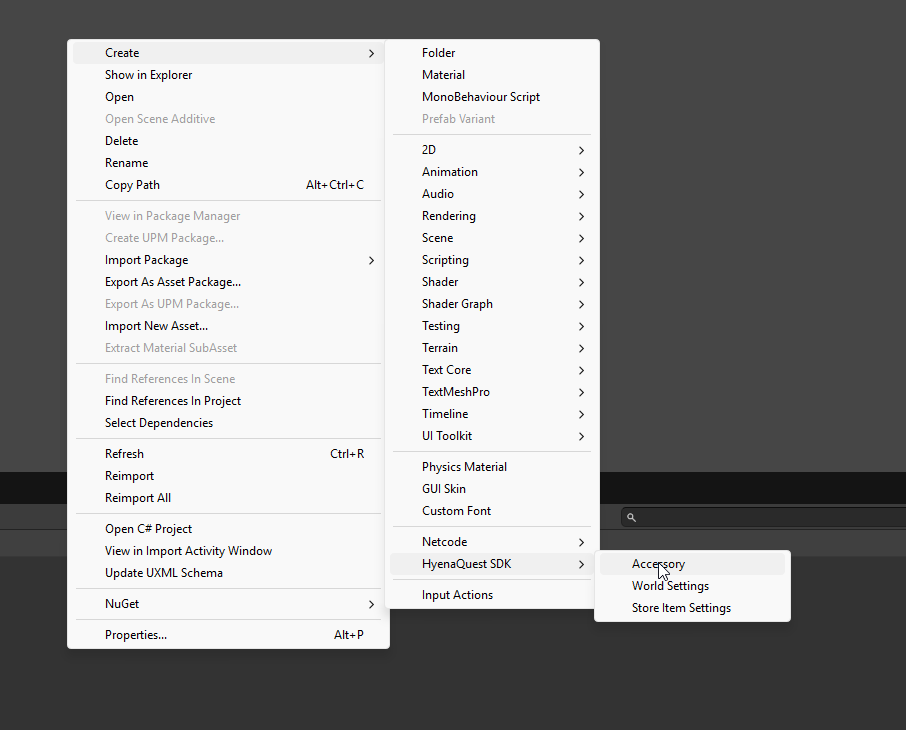
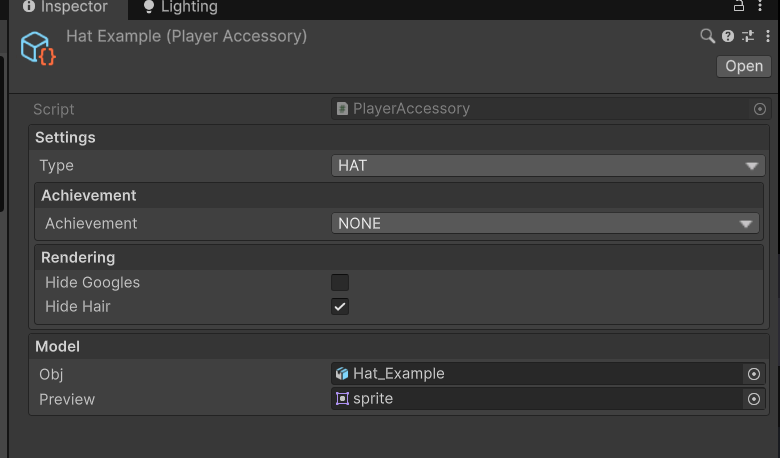
- Create a new PlayerAccessory
(right click on the assets -> HyenaQuest SDK -> PlayerAccessory). Make sure you name it the same as the folder.
4. Build the Custom Accessory
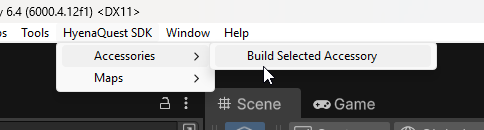
- Build the custom map by clicking on HyenaQuest SDK -> Accessory -> Build Selected Accessory
- After Unity is done, it will generate a
Buildfolder containing your maps. It will generate a preview picture andmod.jsonif one does not exist.
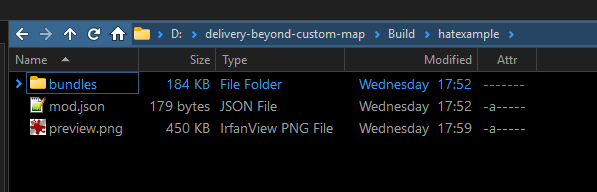
Ensure the tag ACCESSORY is present in the mod.json
Ensure the type is set to CLIENT in the mod.json
- Test your map by copying the built folder into
accessories/next to the game's executable. (Create one if it does not exist) - Done! Take a look at Uploading on how to upload your mod to the Steam Workshop.
Important Notes
- All accessories need the same bone structure and blendshapes.